Note: This tutorial
by Shari Hiller, was originally posted online on March 23, 2010,
through mattandshari.com website - which is no longer online.
She shared it as part of the Room by Room show from HGTV.
Thank you Shari for giving me permission to post it here!
Learn to Sew an Exquisite Baseball Quilt.
Here’s a project for you to make for the sports enthusiast
in your home. Sure, this one is baseballs, but how hard would it
be to make them in the shape and colors of footballs, basketballs,
golf balls, etc.?
What’s a baseball quilt you ask? Well it’s something
my husband has been begging me for ever since we got married. So
finally, for his 50th birthday, I made it for him. He had explained
what he wanted several times over the years and I guess it just
took me some time to figure out how I was going to accomplish what
he wanted.
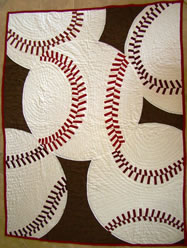
His idea was to have an all white background
and just the red stitches sewn on in the appropriate places so your
eyes and mind could “see” the ball even though it really
wasn’t there. I thought it sounded like a wonderful idea,
but I just couldn’t figure out how to do it.
Now that I have this baseball quilt finished, I think if I just
zeroed in on one baseball, I might be able to create what he was
really after. However, that’s another quilt and another article!
So, if you have interest in putting together a baseball quilt for
the baseball enthusiast in your home, here’s how I did it.
Instructions:
1. I started with soft white cotton for my baseballs. I washed the
fabric first and did some light ironing so it would at least lay
flat.
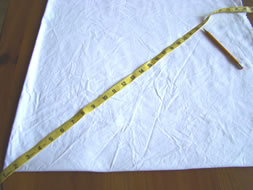
2. I folded the white fabric in half lengthwise then I folded one
end up as far as I needed to draw ¼ of a baseball. I kept
my fabric tape measure at the corner of the four layers and made
marks at 22” following the curve of the ball.
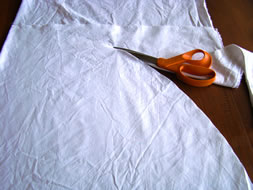
Once the marks were in place, I followed them with my scissors and
cut out the only complete baseball in the quilt.
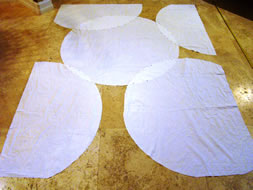
3. I then cut out portions of baseballs, though all from the same
44” circumference so they looked like they were all the same
size ball, just fragments of each one. I did end up cutting out
4 complete baseballs and one of them I was able to get two pieces
from making it look like there are 5 baseballs represented. I pinned
them together to see how they would look and where they would overlap.
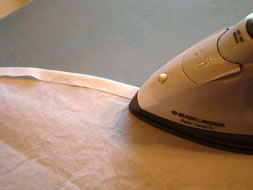
4. The edges were then ironed to the back at about ¼ inches.
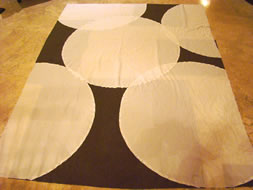
5. Next, I filled in the spaces between the baseballs. If you look
closely you can see that I then cut square and rectangular pieces
of the brown background fabric I selected to fit and fill up the
spaces between the baseballs. I pinned everything in place and then
machine stitched the baseballs to the background. Then, because
the dark brown fabric could be seen through the white baseballs,
I trimmed off the excess background fabric close to the seams.
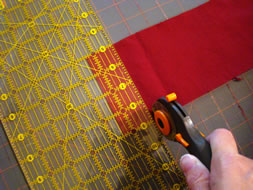
6. Now, the hard part….the stitching! I did use 5 different
reds to make the stitching, one color for each baseball. I varied
the finished length of the stitches from 3” at the longest
to about 1” at the shortest to make the balls look three dimensional,
but they were all ¾” wide. So, their cut size was 4”
by 1 ½”. I ironed all the raw edges to the back, and
then when I wanted the stitches to be shorter, I cut the length
and simply folded the ends over.
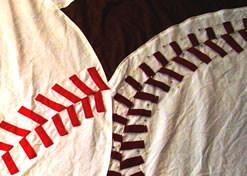
I pinned all the stitches for one baseball in place before I machine
stitched them on so I could be sure the ball looked like it was
three dimensional. To make it dimensional, the stitches were long
on one side of the stitch line and short on the other side. Notice
too that I had to angle the edges of the stitches that went along
the stitch line.
Tip:
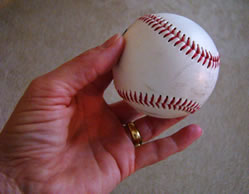
To make this baseball quilt look right, I had to get the curves
of the stitching just right. To picture them I held a real baseball
in my hand and closed one eye so I saw it in two dimensions only.
From this I sketched the curves of the stitching onto the white
baseballs in light pencil.
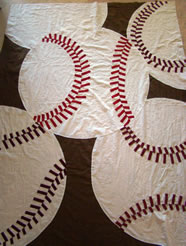
As each baseball was finished, the quilt got more and more interesting
and three dimensional. I kept placing it on the floor to look at
it and marvel at the fact that I had really done it!
Of course I could only look at it when my husband was out of town
because as you recall, this fabulous and long awaited baseball quilt
was a surprise for his 50th birthday!
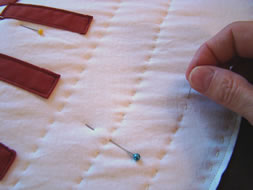
7. Once all the stitching was in place, I layered a brown backing
fabric with the quilt batting and the top. I pinned the three layers
together and started the quilting process. I decided to follow the
curves of the stitching on all the baseballs.
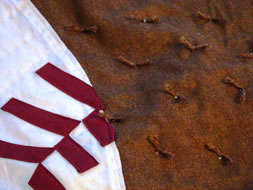
8. To make the background look different, I used brown yarn and
simply punched through from the front to the back to the front again
and tied the yarns.
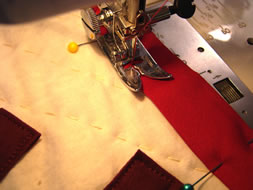
9. The final step was using purchased binding tape to finish off
the edges!
FYI – When the quilt was complete it measured 62" wide
x 82" tall and the baseballs ended up being about 43"
in diameter.
This is one of those projects you create in your lifetime that is
never forgotten. It was hard work, it took a lot of time, and it
was made with love for someone special. What could be better?
Shari
